New RamboMini motherboard
-
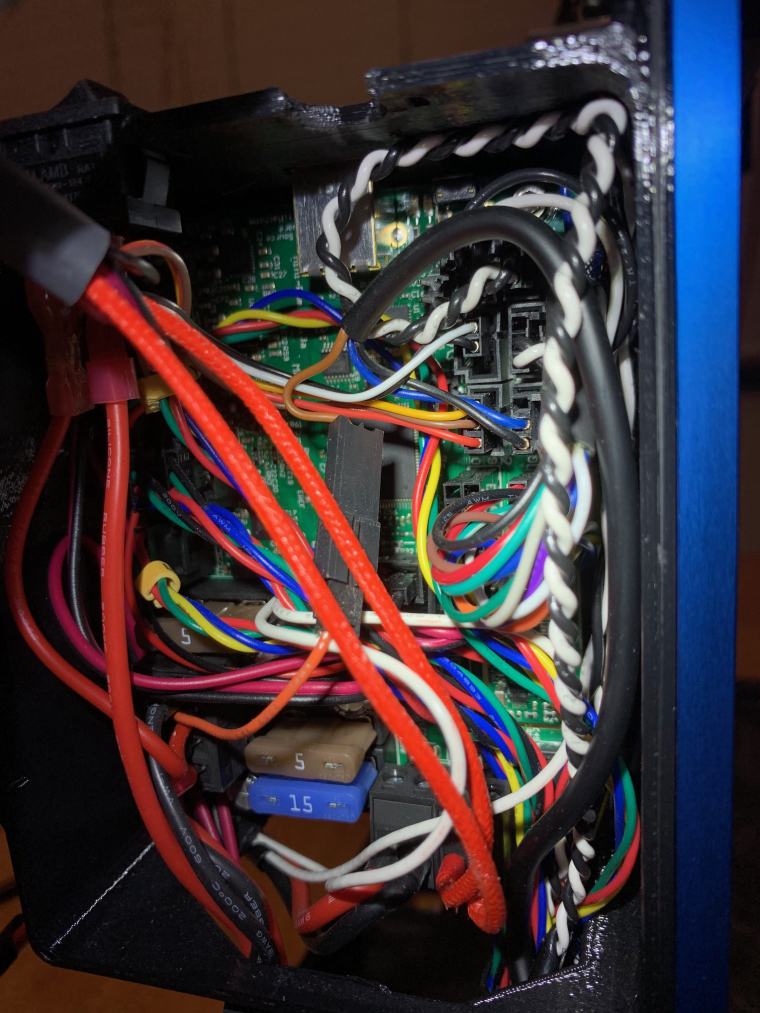
Hi there, folks, I just replaced my RamboMini motherboard that failed. I took pictures of the old board to make sure the wires are all oriented the correct way to wire in the new board. I want to verify to make sure I didn't make a mistake.
I have gone through the schematics and the connection diagram available on the RamboMini github and think everything is okay and wired correctly. I also annotated on my connection diagram how my wires were connected on my board. Having pictures of someone else's board showing the connections to the board would help making sure I didn't write something down incorrectly or worse yet wired wrong. Could you that have a D-132 Pulse printer share your pictures of how your board is wired, please? We can exchange pictures. Thanks for your help.
Kenneth
-
Well to start off, I have a D-232 model. I'm unsure of the differences in the naming conventions of the Pulse, but seeing as how it could be a while before someone else replies, or sees this post; I thought I'd provide some possibly irrelevant data in the spirit of helping.
This picture, of terrible quality, is something i quickly took when replacing the BL Touch harness for reference. Again it's a D-232 model, but it may help.

If you still need some help by the weekend, I'll try and get a better shot if you need it.
-
Here are some pics of a C232
![0_1600825540483_20200217_150000[1].jpg](/assets/uploads/files/1600825545083-20200217_150000-1-resized.jpg)
![0_1600825699598_20200218_101042[1].jpg](/assets/uploads/files/1600825705966-20200218_101042-1-resized.jpg)
![0_1600825778473_20200218_092533[1].jpg](Uploading 98%)
![0_1600825898881_20200218_100600[1].jpg](/assets/uploads/files/1600825903544-20200218_100600-1-resized.jpg)
Some pics when I disassembled it
-
Hey Thanks. That's the same motherboard, so those help a lot. Those confirm what I had for the wiring of the motherboard. Looks like you may have the same thing happening to your wires coming from the mosfets like I did. My bed heater output got to my wires somehow and cause the terminal block to fail, which resulted in the mosfet not working. I just need to get the firmware installed on the board and I will be set to go. Unfortunately, there isn't any firmware on the git hub so I am slowly going through the Marlin 2.0.6 and trying to get it to compile and work. That's uber tedious. But I am making progress. I really appreciate your photos. They really helped a great deal.
-
@hamprinter Thanks! That really helped. I was afraid with some of the bundles that I may have written Bl for blue and not read it as Bl but as black when I put things back together. You're pictures a a big help. Thanks for sharing that with me.
-
@neutronken It will do it again and again that is why mine is apart.
1.) The wires from the bed need a strain relief otherwise the connectors on the board wiggle back and forth as the bed moves and arc and that melts the connector. etc. your mosfet is probably fine but the connector is shot - the only way to save it maybe is break the plastic out, clean up the studs and solder to it.
2.) You will have the same problem on the power input only it will take at least 2x as long. The problem is the Pulse runs at 12 V and has only a 15 Amps PSU (where the rambo website says use 16A minimum at 12 V. Plus you need heavier wires to the bed if you run it close to 100 and wires that are high flex silicon insulated and 14 gauge or less so they dont get hot plus it should run underneath it with a drag chain.
3.) You'd be better off to replace the PSU with a 24 V 15 A. or at least 24 V 10A but most are 360 watts or so. For that you will have to replace the heating cartridge and fan on the V6 and change the wiring on the bed.
4.) It is also suggested that there is cooling on the mosfets both the one for the bed and the Hotend IOW the case should have at least a 5010 fan or better blowing across the board to keep the heat down. Cause if you run the pulse like me (Bed 100 hotend 260-290) then some areas of the board will get quite hot.So to make the Pulse a sound printer it needs at least a 24V PSU, 24V hotend, an electronics case with a fan, the wiring properly run to get rid of the "birds nest effect" And a different hotend mount preferably not done in Ryno that does not either cause a thermal runaway on the bed or the hotend when you run the printer hot as described above
I am also working on an enclosure for mine, and change the mount of the extruder and put the filament on top of the cage and change the hotend mount with one with a better fan.
So II think the only thing that might stay original is the extruder and the frame and the X/y/Z motors and mounts